Window installation done for Halifax weather
Product choice gets the brochure space; installation decides whether you still have drafts in February. This page walks through insert versus full-frame, sill pans, foam, flashing sequences, winter installs, and the questions Halifax homeowners learned the hard way on local forums.
Insert versus full-frame
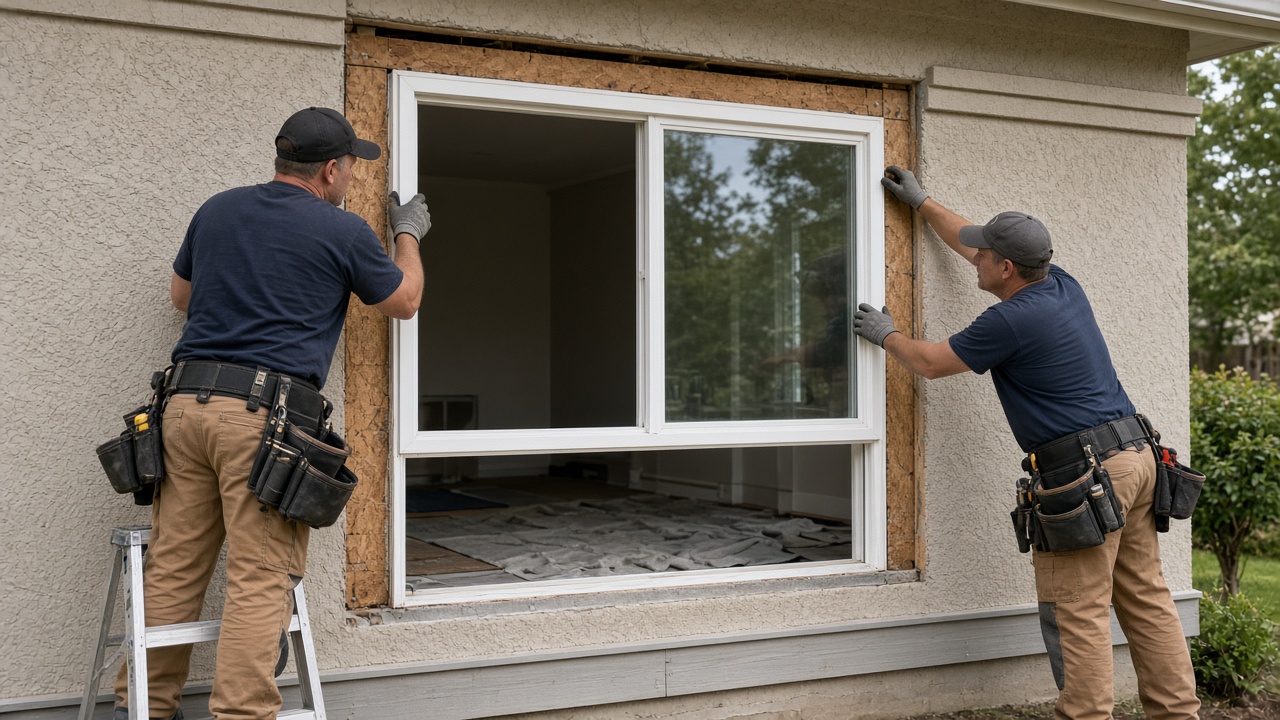
Inserts go into the existing frame — fast, less trim disruption, smaller glass. Full-frame removes the unit to the rough opening so you can inspect framing, install a sill pan, and tie flashings into the weather-resistive barrier. Prefer full-frame when you suspect rot, recurring leaks, or frame drafts. Prefer inserts only when frames are proven solid and budget or heritage interior trim constrains the job.
Sill prep is not optional conversation
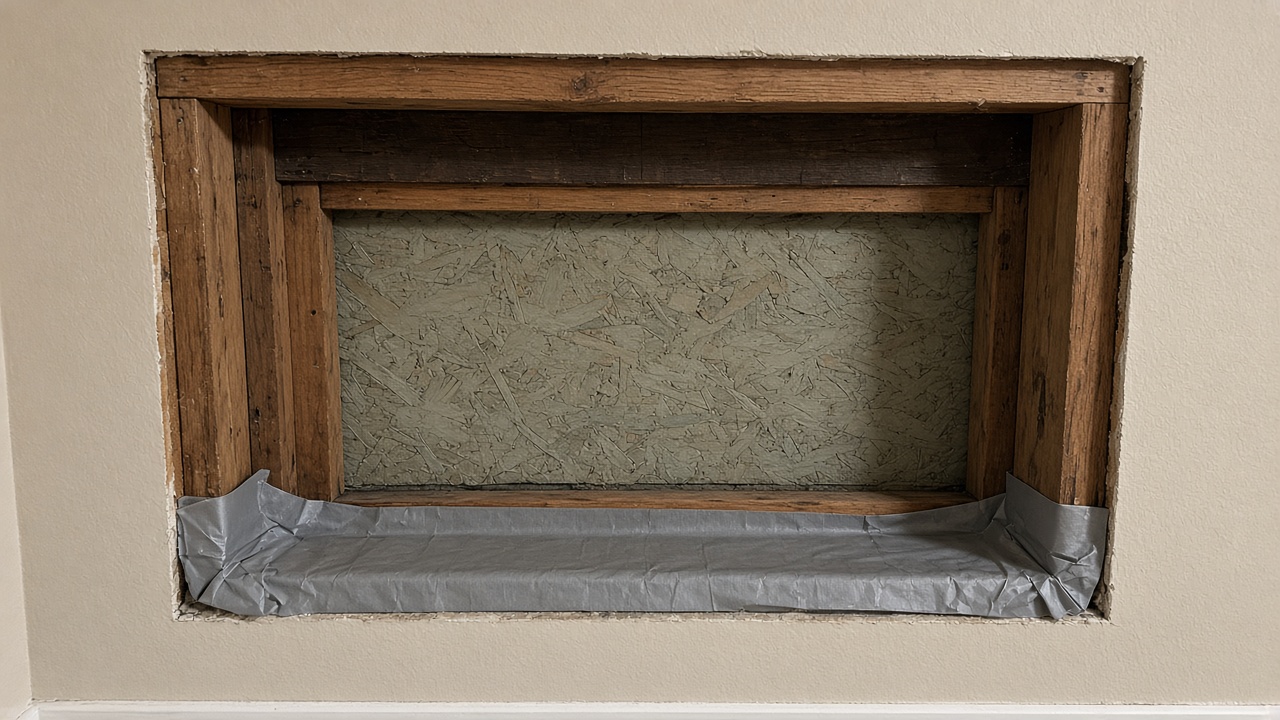
Halifax homeowners have reported crews skipping sill prep on retrofits while others include it as standard. Five minutes per opening can change water management. Ask explicitly. Get it on the quote. If a company says sill prep does not help on retrofits, ask them to explain their drainage path in writing.
Foam, flashing, and tape
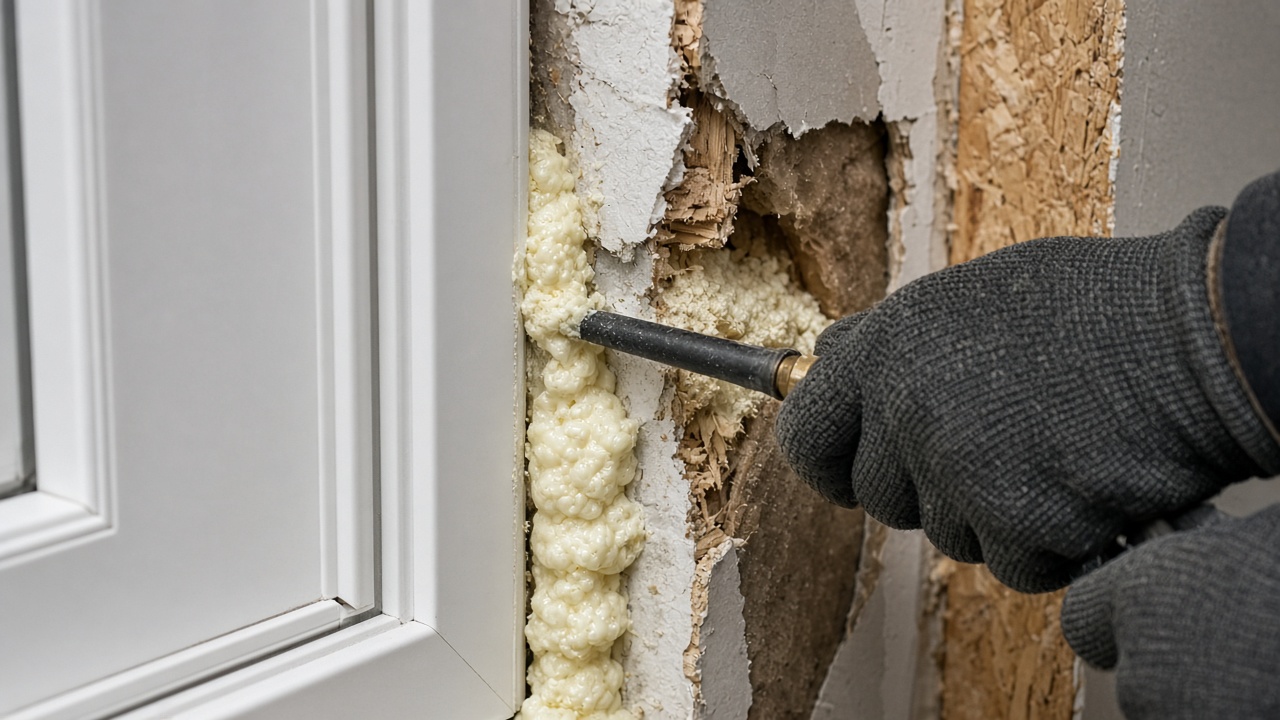
Use low-expansion foam made for windows and doors. High-expansion foam bows jambs. Under-foaming leaves convective loops you feel as drafts after trim is on. Full-frame flashing sequences typically layer weather barrier, sill pan, back-caulked flange, and flashing tape so water that gets behind cladding can drain out — not sealant smeared only on old brickmould.
NAFS and labelling on site
Keep NAFS and ENERGY STAR labels available for inspectors and for rebate final assessments. Photograph labels before films peel. Coastal jobs should confirm water and air ratings match exposure.
Winter installation in HRM
Installs continue through cold months with weather protection. Sealants and foams have temperature limits — crews may stage openings and close up the same day. Ask how they handle freeze risks on your schedule.
Rot contingencies
Good quotes explain what happens when tear-out reveals soft sills. Allowances or time-and-materials rates prevent surprise invoice fights. Insert-only prices that never open the wall cannot honestly cover hidden rot.
Day-of expectations
- Floor protection and furniture shifts agreed in advance
- Weather-tight each opening before leaving for the day
- Operate every sash before final trim
- Cleanup scope defined (broom clean versus detail clean)
- Punch list and warranty registration paperwork
Pace
Pace depends on opening count, bay complexity, and rot discoveries. Confirm a day-of plan and whether anyone must be home for the full install.
Book a measure
Call (902) 999-9999 or use the form. Bring photos of interior and exterior of problem openings.
Measuring discipline
Good installs start with disciplined measuring: width and height at multiple points, diagonal checks for out-of-square openings, notes on siding type, and interior extension depth. Renovation openings are rarely perfect rectangles. Shimming plans should keep the sash square even when the rough opening is not. Vinyl that is racked during install will not seal or lock correctly later.
Integration with siding and WRB
Full-frame flange windows need a path to the weather-resistive barrier. Vinyl or fibre-cement siding may be cut back and re-trimmed; brickmould details differ on masonry. Sealant joints are maintenance items — they are not the only drainage control layer. Ask how head flashings and Z-flashings are handled above openings.
Interior air sealing
After foam, many specs add interior sealant or tape strategies so moist indoor air cannot condense in the rough opening. Skipping the interior seal recreates mouldy jambs in tight modern houses. Confirm the interior air-seal step, not only exterior caulk aesthetics.
Quality checkpoints mid-day
Before trim closes the story, check that sashes open, close, and lock without forcing, that locks engage on all points for multipoint hardware, that reveals look even, and that foam fills without voids you can see with a mirror. Photograph the opening. Friendly oversight beats surprise drafts in January.
Disposal and recycling
Old sash, glass, and vinyl frames need a disposal plan. Some shops include haul-away; others leave piles. Glass and vinyl recycling options vary regionally. Put disposal in the quote so dump fees do not appear as a surprise.
Training and supervision
In-house crews and subcontractors both exist in HRM. Ask who trains flashing details and who inspects completed openings. Warranty paperwork should name the labour warrantor clearly. A beautiful product with unsupervised install is still a risk.
Health and safety on occupied homes
Install day means noise, vibration, and brief weather exposure at each opening. Agree on pet containment, child safety, and which rooms stay usable. Dust control matters when cutting foam and trim. Ask crews to seal work zones when sanding painted surfaces in older homes.
Electrical cords, exterior outlets, and security sensors near openings need protection. Alarm contacts on operable sash may need rewiring after replacement — coordinate with your alarm vendor if applicable.
Brick, stone, and stucco edge cases
Masonry openings without nailing flanges need alternate anchoring and sealing strategies. Stucco cutbacks must be patched to shed water. These details change labour hours. A vinyl-siding quote template may not transfer — insist on cladding-specific method statements.
Blower-door and energy context
If you are mid Home Energy Assessment, window installs between initial and final visits can change airtightness. That is often good — just coordinate so the energy advisor knows what changed. Keep product stickers on for verification. Air sealing around new units contributes to comfort beyond the glass U-factor alone.
Callback etiquette
New windows can need minor adjustments after houses settle through a season. Operate locks monthly for the first year and report binding early. Photograph issues. Clear communication beats angry reviews when a hinge screw backs out — most reputable shops will adjust labour-warrantied hardware.
Subtrade coordination
Siding, roofing, and interior painters may share the schedule. Put a single project lead in charge of sequence. Window installers should not be asked to flash incomplete WRB, and painters should not seal weep holes shut. Simple coordination prevents expensive rework.
Record keeping for resale
Buyers like dated invoices, series names, glass packages, and warranty transfer instructions. Assemble a folder at substantial completion. Future you will thank present you when a fogged lite appears in year eight and you need the glass specification.
Local quote preparation checklist
Before any measure visit in Halifax Regional Municipality, write down the symptoms by opening: draft, fog, leak, hard to lock, or cosmetic only. Note which elevations face harbour wind or busy roads. List rooms that must stay accessible for kids, elders, or remote work. Share photos of interior and exterior details, including sills and flashings. Mention whether you already booked a Home Energy Assessment or plan to. That packet lets a technician spend time on diagnosis instead of basic discovery, and it makes three competitive quotes easier to align later.
Ask every bidder to return a one-page scope summary covering method (insert or full-frame), sill detail, foam type, trim inclusions, disposal, lead time, and the split between product and labour warranty. Keep those summaries side by side. When numbers differ, highlight the line items that changed rather than arguing about brand logos. Coastal Nova Scotia rewards that kind of paperwork discipline more than it rewards brochure adjectives.
Finally, confirm access: driveway space for a truck, ladder or scaffold needs, pet plans, and whether anyone must be home for the full install day. Small logistics details prevent half-finished openings when weather turns. Call (902) 999-9999 when you want help turning that checklist into a scheduled measure visit.
Seasonal timing for Halifax projects
Spring and early summer measure visits often aim at late-summer or fall installs once custom units arrive. Winter installs remain possible with weather protection, though sealant chemistry and crew comfort can slow detailing. If your primary pain is heat loss, prioritize the windward and north openings first when phasing. If your primary pain is leaks, prioritize the failing elevation regardless of season and use temporary protection until permanent units land.
Storm seasons and freeze–thaw cycles are when weak flashings announce themselves. After a nor'easter, inspect sills and interior drywall at known weak openings before cosmetic painting hides evidence. Pair any replacement plan with gutter and downspout checks — roof water dumped against a fresh window is an avoidable failure mode across Halifax housing stock.
Build a simple calendar: enquiry and photos this week, measure within your bidder's lead time, deposit and order with written scope, install when product arrives, then a thirty-day adjustment check. Put Efficiency Nova Scotia assessment dates on that calendar if rebates matter so ENERGY STAR stickers are still in place for the final visit. Call (902) 999-9999 to align that calendar with an actual measure appointment.
Frequently asked questions
Insert/retrofit or full-frame replacement?
Full-frame removes the old unit, allows a sill pan and flashing to the rough opening, and reveals rot. Inserts are faster and cheaper but sit in the old frame and shrink glass area. Prefer full-frame when sills are suspect or drafts come from the old frame.
Is sill prep required on retrofits?
Homeowners report some HRM crews skip sill prep on retrofits while others include it; one local commenter expected it as standard. Ask explicitly and get it in the quote.
What kind of spray foam should installers use?
Use low-expansion window-and-door foam; high-expansion foam can bow jambs. Halifax homeowners have found under-foamed gaps causing drafts after the fact.
Will you put down mats and clean up?
Professional crews typically protect floors and vacuum each room; cleanup quality varies by company. Ask what broom-clean includes before install day.
How do I know the flashing is done right?
Proper sequences integrate the weather-resistive barrier, sill pan, flange sealant, and flashing tape so water drains out — not sealant-only against old brickmould. Request a description or photos of the opening before trim.
Can windows be installed in winter in Halifax?
Yes, with weather protection and care; sealants and foam have temperature limits. Crews still install in cold months; scheduling may favour milder days.
Who installs — in-house crew or subcontractors?
Both in-house and subcontracted models exist locally. What matters is training, supervision, and who honours the labour warranty—ask who will be on site.
Should I be on site during install?
Homeowners who inspect foam and square operation before trim goes on catch issues earlier. You do not need to micromanage, but a mid-day check helps.
What happens if they find rot?
Good quotes explain an allowance or time-and-materials for sill and framing repairs discovered after tear-out. Ask before signing.
How many windows per day is normal?
Examples include about nine windows in about 1.5 days, or four windows in about five hours with a full crew. Complexity and bay units change the pace.